Showing posts with label windows. Show all posts
Showing posts with label windows. Show all posts

In Windows 8, Microsoft quietly removed a useful networking feature: ad-hoc networks.
In Windows 7 (and previous OSes), the tool could turn your PC into a Wi-Fi hot spot, allowing it to share its Ethernet or other Internet connection with other devices by broadcasting its own network.
So, if you paid for Internet access at a cafe, or you're at work, and want to share your PC's Internet with your phone or tablet, this feature would let you do that.
It is very possible to do this in Windows 8, but the built-in method requires fiddling with the command prompt. And for some of us, walking into that black abyss is daunting.
Instead, check out Virtual Router Plus. It's a free, open-source program that does the geek work for you, allowing you to quickly fire up an ad-hoc network whenever you need one.
Once you've downloaded the file, extract it, and launch the VirtualRouterPlus file within that folder. There's no real installation here -- the program will simply launch.
At this point, setup is easy. Enter a name for your network, then choose a secure password with at least eight characters. Finally, choose the connection you want to share (there will most likely only be one choice), and click Start.
To test it out, grab your phone or tablet and connect to your newly created Wi-Fi network. If it doesn't show up, stop the connection on your computer, and hit Start again.
Also remember that your computer needs to stay awake and running to keep its ad-hoc network alive. So, tweak your power settings if need be.


Windows 7 Ultimate SP1 x32 & x64 Integrated March 2013
This is the original Microsoft Windows 7 ultimate SP1 ISO from Microsoft. Including Microsoft updates until 17.3.2013 and Internet Explorer 9.
- This release is the best you could find on the net, because Maherz made it just simple:
* NO tweaks or add-ons.
* NO additional programs and software added.
* NO graphics, scripts and wallpapers added or changed.
* It's the original image from Microsoft except added updates and IE9!
- System requirements:
* 1 gigahertz (GHz) or faster 32-bit (x86) or 64-bit (x64) processor.
* 1 gigabyte (GB) RAM.
* 16 GB available hard disk space.
* DirectX 9 graphics device with WDDM 1.0 or higher driver.
Download :
32 bit
64 Bit
By : CyberTech News

Windows 8 is the latest collection to the Microsoft operating system (OS). Windows 8 has a slick design and it is also very nice to use with some extra features that will make you love it even more.
I love windows 8 and its features but to be honest with you guys, I don’t have the money to purchase its license so I decide to search online to see if I’d see a crack or a patch for my windows 8. Hey! For your information guys I had no luck searching for the crack because all I could find was virus, buggy and empty cracks that crashes my system over and over again. We all know that window 8 is a new OS and the crack might be hard to find but I never gave up, so after my long search, I saw just a serial number so I decide to put the serial key manually myself and after many trial and errors, I finally made my windows 8 fully genuine. Yayyy
Right now, you too can activate your windows 8 with this trick I am about to drop to be fully genuine without the fear of bug or viruses. I am ready if you’re ready…
HOW TO ACTIVATE YOUR WINDOWS 8 TO BE FULLY GENUINE
First of all you will open your command prompt as administrator

Now type exactly what you see below (Press enter after each line)
slmgr /upk
slmgr /ipk NG4HW-VH26C-733KW-K6F98-J8CK4
slmgr /skms lunar21.no-ip.org:80
slmgr.vbs -ato
Have you completed writing the above command? If you’re done, restart your pc and voila, you have successfully activated your windows 8 to be fully genuine. Now enjoy your activated windows 8 and be limited no more…
This trick was tested on Windows 8 Professional Retail. Enjoy yourself and activate yours today.
What are the questions that are running through your mind? Pour your speech using the comment box below and if you got something to add up to the topic then use the comment box below as well.
Do you like the post? Then do click the like button, share and recommend us to friends. Oww before you go, subscribe to our feed for latest update to your mail.

You All Know About Kaspersky. Its a best antivirus in the world. I m going to show you How To CRACK/PATCH kaspersky 2012 and you can do this trick with all Version's of Kaspersky. So here the Hack Start's...
Kapersky Antivirus Download link
Step1: Open Your Kaspersky Go To Settings then at the top there a four option's go to last option{Detected Threats and Exclusion Rules}.
Step2: Now, look at left Side, There go to second option "Self Defense" Turn off Self Defense and Click Ok.
Step3: Now, Go to Start menu, Click Run and Type "regedit".
Step4: Now in regedit Go to:
HKEY_LOCAL_MACHINE\SOFTWARE\KasperskyLab\protected\AVP9\environment(For 32bit OS: - windows xp or vista or windows 7)
HKEY_LOCAL_MACHINE\SOFTWARE\Wow6432Node\KasperskyLab\protected\AVP9\environment(For 64bit OS: - windows xp or vista or windows 7)
Step5: Now look for PCID and right click on it and change the last four digit{change value} enter any four number's like 1,2,3,4 or 9,8,7,6 any number.
Step6: After changing the value exit from there and from taskbar right click on kaspersky icon and Click Exit.
Step7: Now Go to start Program's and when you open kaspersky from there, you will get kaspersky License Screen, Then activate it as trail.{it takes only seconds}

Step8: After Activation Turn on your Self Defense.
yipeeee Your Kaspersky has been cracked.
# After 30 days, when your license expire, go to step 1 to 8 and you got a new 30 days license from kaspersky server automatically.
# This is a trick is done in a few minutes and give you a new trial license.
Sometimes we don’t have any media to share movies and files with our
friends. So I am going to tell you that how you can share your movies
and other files with friends. We will be doing this by transferring files
via Ad-Hoc Wireless Network.
1. Go to Network And Sharing Center ( Control Panel -> Network And Internet -> Network and Sharing Centre )
2. Click on ‘Set up a new connection or network’.

3. Select last option “Set up a wireless ad hoc (computer to computer) network” and click Next.

4. Now enter the network name and security key for your ad hoc network.

5. Your ad hoc network has been created.
Now you can connect to this network by wifi and passing the above key.
And share any thing with the network
1. Go to Network And Sharing Center ( Control Panel -> Network And Internet -> Network and Sharing Centre )
2. Click on ‘Set up a new connection or network’.
3. Select last option “Set up a wireless ad hoc (computer to computer) network” and click Next.
4. Now enter the network name and security key for your ad hoc network.
5. Your ad hoc network has been created.
Now you can connect to this network by wifi and passing the above key.
And share any thing with the network
By this trick, you will be able to right click any file or folder and use the Browse for Folder dialog to choose the location you want to move or copy your file or folder to, without having to go to the destination path, its cool!

First we will add the copy and move options to the right click menu of all FILES.
CLICK Start>Run, type REGEDIT and click OK to open up the registry editor and make your way to this key:
HKEY_CLASSES_ROOT\*\shellex\ContextMenuHandlers
Right click the ContextMenuHandlers key and choose New>Key.
Name the new key “Copy To” (without the quotes).
Repeat the above and create another new key named Move To.
You should now have two new subkeys under the ContextMenuHandlers key:
HKEY_CLASSES_ROOT\*\shellex\ContextMenuHandlers\Copy To
HKEY_CLASSES_ROOT\*\shellex\ContextMenuHandlers\Move To
Select the Copy To key and in the right hand pane, double click “Default”
Enter this clsid value as the value data:
{C2FBB630-2971-11d1-A18C-00C04FD75D13}
Next , select the Move To key and in the right hand pane set the default value to:
{C2FBB631-2971-11d1-A18C-00C04FD75D13}
This now takes care of the Copy and Move options for the right click context menu of all your files.
Now all that is left is to add the same options to the right click menu of all your folders.
The procedure will be the same as for files but at a different key:
HKEY_CLASSES_ROOT\Directory\shellex\ContextMenuHan dlers
Right click ContextMenuHandlers and create a new key named Copy To.
Right click it again and create another new key named Move To.
left click on the right hand pane, add the same default values as you did for Files:
For Copy To:
{C2FBB630-2971-11d1-A18C-00C04FD75D13}
For the Move To:
{C2FBB631-2971-11d1-A18C-00C04FD75D13}
Exit the registry and you are done.
Now when you right click on a file or folder, you should see two new options: Copy to Folder and Move to Folder.
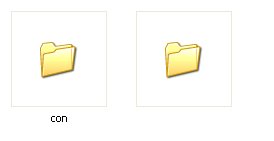
- Make a New folder on desktop or where ever you want.
- Right click on this newly created folder and select Rename.
- Erase the text showing "New Folder".
- Now keep Pressing Alt (i.e alter key) and type 255. If you are on laptop then you need to enable your Num Lock and type from the highlighted number keys not from those below function keys.
- After that leave alt key and Press enter.
- Done you just created nameless folder.
F7
If you think using Doskey to check the command history is cool, this is even cooler. Simply press F7 and a history of the commands you have used in the same session pops up right in the middle.

Mode to adjust the size of CMD window
Very useful when the output characters extends beyond the 80 characters.
Syntax: mode [width], [height]
It’s hard to have a nice screenshot to demonstrate, but type in mode 120, 25 in the Command Prompt to see what happens.
Color to change the default color of CMD
Syntax: color [attr]
The color attr are specified by 2 hex digits, the first one presents to the background while the second one responses to the foreground. Each digit can be found by simply typing color /?

Tree to show off the folder structure
Syntax: Tree [drive:][path] [/F] [/A]
By default, it graphically displays the folder structure of a drive or folder. The switch /F will list the files in addition to each folder.

If you want to output the structure to a text file, use /A switch along with the > switch. For example, the following command outputs the structure to a text file named structure.txt
C:\Users>tree /a h:\ebooks\OperatingSystem > h:\temp\structure.txt


RD to completely delete a folder
Syntax: RD [/S] [/Q] [drive:]path
By default, it only removes a folder that is empty. With a switch /S, you can completely delete a folder that still has files and subfolders. It’s extremely useful when you want to delete folders while you are at the recovery mode with no GUI.
Tip #6: Run multiple commands at once
With “&&” to separate, you can run multiple commands at once from one line. The commands run sequentially from left to right and it breaks if any of the command fails.
Simple but useless example:
c:\>color fc && dir
Tasklist to display the running processes
It not only lists all running processes on the local system but also displays on a remote computer as well. There are a lot of good use of it. Be sure to use Tasklist /? to find out more. Here are a few good use of them.
The switch /SVC to list the tasks with services that host them.
If you think using Doskey to check the command history is cool, this is even cooler. Simply press F7 and a history of the commands you have used in the same session pops up right in the middle.

Mode to adjust the size of CMD window
Very useful when the output characters extends beyond the 80 characters.
Syntax: mode [width], [height]
It’s hard to have a nice screenshot to demonstrate, but type in mode 120, 25 in the Command Prompt to see what happens.
Color to change the default color of CMD
Syntax: color [attr]
The color attr are specified by 2 hex digits, the first one presents to the background while the second one responses to the foreground. Each digit can be found by simply typing color /?
Tree to show off the folder structure
Syntax: Tree [drive:][path] [/F] [/A]
By default, it graphically displays the folder structure of a drive or folder. The switch /F will list the files in addition to each folder.
If you want to output the structure to a text file, use /A switch along with the > switch. For example, the following command outputs the structure to a text file named structure.txt
C:\Users>tree /a h:\ebooks\OperatingSystem > h:\temp\structure.txt
RD to completely delete a folder
Syntax: RD [/S] [/Q] [drive:]path
By default, it only removes a folder that is empty. With a switch /S, you can completely delete a folder that still has files and subfolders. It’s extremely useful when you want to delete folders while you are at the recovery mode with no GUI.
Tip #6: Run multiple commands at once
With “&&” to separate, you can run multiple commands at once from one line. The commands run sequentially from left to right and it breaks if any of the command fails.
Simple but useless example:
c:\>color fc && dir
Tasklist to display the running processes
It not only lists all running processes on the local system but also displays on a remote computer as well. There are a lot of good use of it. Be sure to use Tasklist /? to find out more. Here are a few good use of them.
The switch /SVC to list the tasks with services that host them.